Tag Archives: algebra

Cable Design for Satellites

The Description

This is an activity that was created by a harness and cable engineer in the aerospace industry. He is in charge of designing all interconnects between all the various systems / components on a satellite. This is an actual design problem that he made during the course of his job. The only thing he changed was the length of the wire from the ICB300 to the LAE ,because he wanted the 24AWG wire to result in a voltage drop greater than one, in order to test whether the students would see that and move to a larger wire.

The solutions are on the second page of the pdf. These solutions were authored by the engineer who wrote the problem.

I have a simplified version of this problem in my Satellite Design Teams activity.

The Advice

I would make sure that the students know this is an actual design problem for a satellite.  It is not a simplified representation of a problem someone might do, rather it is a real problem that someone must do, in order for the satellite to achieve mission success.

Looking at the equation again:  V = L * R * A.  V is the voltage drop, which is what they are solving for.  L is the lenght of the wire, which is given in the problem.  R is resistance, which they get from the table (they first choose a wire size, then look at the table for its resistance).  A is amps, which is given to be 0.8 in the first bullet point of the problem.

So basically, A is constant, and the students are inputing some value of L and R, in order to find V.  Then they are adding up all their V’s, and seeing if the sum is less than 1.

The design tradeoff between weight / voltage drop is key here.  Large wires have very low voltage drop, and since we cannot have a voltage drop greater than 1V, we are tempted to just use very large wires.  But large wires are also heavy, and satellites need to be as light as possible.  Thus the tradeoff between weight and voltage drop.  We must select the smallest possible wire, that still has a voltage drop less than 1V.

The Goods

Wire harness exercise

Bracketology


The Description

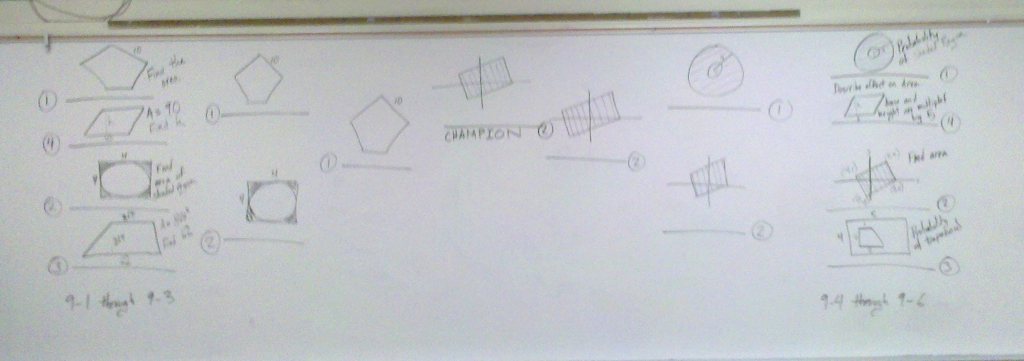
Bracketology is a review game based on the NCAA basketball tournanment.  Basically you pick problems, setup the bracket, and the goal of the game is to figure out which is the most difficult problem.   You setup the intial matches, and then students use whiteboards to vote for the most difficult problem.  Then they work the losing problem on a piece of paper.  Here’s how it works:

– Intially pick 4 problems from the first part of a chapter, and then 4 problems from the second part of a chapter.  Then rank them from #1-4 based on how difficult you think the problems are.  The #1 seed should be the problem you consider most difficult of the group, the 4th seed should be the easiest.

– Draw the bracket on the whiteboard, the highest seed should play the lowest seed, so put #1 vs #4 and #2 vs #3.

– Have students in groups of two.  Each group gets one whiteboard, and each student needs their own piece of paper.

– Pick a match and have each group use their whiteboard to vote for the problem they think is the most difficult.

– The winning problem is the one that is voted the most difficult.  Take that problem and draw it into the next round.  All the students should work on the losing problem.

– When you finally get to a champion problem, offer extra credit to any student who can take down the champion.

The Advice

– I would write on the whiteboard the two basic steps that the students are doing:
1. Vote for most difficult problem.
2. Work on the losing problem.

– That above advice is key because students will get confused intially about which problem they should be working on.

– I have two whiteboards in my room.  I use on of them for the bracket, and then I work the problems on the other.

The Goods

I do not use any handouts with this game.  Students take out their own piece of paper and I write the problems all on the whiteboard.


World Cafe

The Description:

This is a math adaption of the World Cafe, which according to its website is “a powerful social technology for engaging people in coverasations that matter”.   I recommend reading their website for a complete description.   The World Cafe also has an extensive online community that can be found here.  I have authored several posts about my experiences implementing it in a math class, which can be found there.  As far as I know, I am the only person implementing this in a math class.

For the World Cafe you put desks in groups of four, and cover the desks with butcher paper, which I call the table cloth.  The butcher paper is like their scratch paper, and they should be doing all the problems on it.  Once they have finished working on the problem, they discuss with eachother about what answer is correct.  Once they have decided on a correct answer, they must write it, along with all the steps, onto their World Cafe Menu.

Each problem is one round, and at the end of each round, all students must get up and go to a different table.  They are not allowed to follow the same people table to table, they must randomly disperse.

At the beginning of each round I give them a minute or so to introduce themselves to their new group, and I make them write their group members names on their menu.

The Advice:

– The actual World Cafe has a table host, but I do not use a host in my classes.

– Make sure that the students write the names of each of there group members in their own writing – passing the menu around for others to sign is not allowed.

– I give the students a two minute warning by playing my harmonica.  And then I play it again when it’s time to switch seats.  Maybe you can use music or something if you don’t play an instrument.

– Students should be allowed to doodle on the butcher paper.

– When you don’t give students colored markers, they tend to doodle less and they do more math.  So I don’t they them colored markers.

– Only final draft work hits the menu, and only right answers get credit.   I tell the students that I do not want to see eraser marks on the menu, that should all be done on the butcher paper.  Telling them I only accept correct answers provides motivation for them to figure out each problem.

– I through in extra credit for my favorite menus.  I have students take them home and turn them in the next day.

The Goods:

World Cafe Menu

Jungle Hideout

The Description:

The Jungle Hideout activity is something I got from Dan Meyer.  He has several in the handouts of his geometry and algebra curriculum, and his blog post about them can be seen here.

You put up 8 to 10 hideouts around room.  Each hideout has one problem on it, with multiple choice answers.  Each answer directs students to a different hideout.  The point of the activity is to find the Jungle Hideout.  Now if they answer every question correctly, they will be sent to every hideout except one.  And the one they are never sent to is the Jungle Hideout.  That is what the students are looking for.

Creating these is easy.  Just pick any order that you want – say for instance you choose 2 – 3 – 8 – 4 – 1 – 7 – 5.  So your hideout is 6.  Once you have your order, you just need 8 mulitple choice problems, and make sure that the right answers go in the correct order.  After that just send the wrong answers anywhere.

A way to differentiate for the advanced students, is to have them be in charge of one of the hideouts when they finish.  When they are in charge of a hideout, they have to answer all the questions of the students at the hideout.  I give the students 2 pts. extra credit for taking over one of the hideouts.

The Advice:

– Never tell students the Hideout without them telling you their order.  Students will come up to me and say “The hideout is 6”.  And I will always respond “What’s your order?”.  This allows me to make sure that they did not just guess, that they actually did the problems.

– I intentionally put more difficult problems by the whiteboards, so I can use those to help explain them.

The Goods:

I have created lots of these, they are listed below by topic (at least they will be when I get more storage space).  Many of the individual problems were taken from Hideouts created by Dan Meyer.

Parallel and Perpendicular Lines

Polygons and Quadrilaterals

Solving Equations

Factoring Puzzle

The Description:

The original puzzle can be found here.

The only thing I changed was that I added a border around the outside of the puzzle.

The puzzle above is in the correct order.  Obviously if you are going to have students cut out the pieces, then you have to scramble the order.  I have already done that, and both versions are in The Goods.  Here is what the scrambled version looks like:

I think the puzzle is too difficult if there is no border.  This is because the students might factor an expression, and then not find the answer in the puzzle.  The problem is that this might lead them to believe they have factored it incorrectly.  I believe putting the border around the outside shortens the activity to a better length, and makes for a better overall experience.

The Advice:

– I recommend using having your T.A. cutout the puzzle pieces from the finished puzzle, and then putting the pieces into separate envelops.  I used the scrambled version of the puzzle and had the students cutout the pieces, and I think too much time was wasted cutting out paper, rather that solving the puzzle.

– I recommend first having all the students find the puzzle piece that has the expressions x^2+5x-6 (it’s the top right piece).  Have them glue it on the top right corner of the answer document (under the heading “My Factoring Puzzle’).  Then have them factor it on the answer document (or separate sheet), and you do that problem on the board.  Next have them search for the answer piece (x+6)(x-1) and glue that piece in the proper place.  I would be doing this along with them on the document camera.  Then do another problem  off of one of the pieces they have glued down, so that when you finallly let them work alone, they already have three pieces glued to their paper.

– The above piece of advice is key, because I originally just told them what to do and let them do it, and I got a lot of students saying “I don’t know what to do”.

The Goods:

FactoringPuzzleWithBorder

Teach/Pair/Share

The Description:

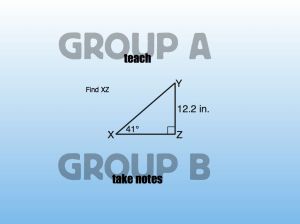
Teach/Pair/Share is my structured version of a pair/share.  It is structured more formally that the regular pair/share in that I have to be prepared to do the Teach/Pair/Share, whereas I can just have students do a pair/share at anytime without slide preparation.  The Teach/Pair/Share fits into #reasoning because it requires the students from group A to teach those in group B.

For the Teach/Pair/Share I have make sure each student has a partner, put those rows closer together, one row is group A, the other is group B.

Intially I will have one of the groups take notes, say group A, and the instruction for group B will be to listen.  I tell group B to just listen – and I make sure they do not have a pencil in their hand, because I do not want them writing anything.  Then I have group A take notes and help me solve the problem.  Once we have the whole problem on the whiteboard, I erase it, and switch the slide.

Now it is time for group A to teach group B, and for group B to take notes on what group A is telling them.  It is critical to be circulating at this point.  Randomly choose a group and ask the student in group B how to do the problem. If they explain it correctly, thank the group A students for great teaching, and the group B student for great learning.

Now repeat the same steps with jobs reversed.  At the end I have one problem that everyone needs to do.  I typically google translate the instructions into a language no one knows, and then I act upset when the students do not initially know what to do.

Math Hospital

The Description:

Math Hospital is an activity I try to do every other chapter.  I was given to me by my old district instructional coach.  He had given me a two page handout, but I have since lost it, and I don’t have a digital copy.   Here’s how it goes:

– The day before I give the students a problem to do on an exit ticket.  Then I look through those tickets for a common mistake, and scan that students work into my slides (student names redacted).

– The Initial slide for Math Hospital is always a reminder of the theme of Math Hospital – failure is helpful and not shameful.  I took that theme from a Dan Meyer post you can find here.  This is where I remind students that getting things wrong is a great opportunity to learn.

– Each student gets one exit ticket to do their work on.

– The 1st part of Math Hospital is called “Reading” and is simply where I ask a couple students to read the problem out loud.  It’s good that the class hears how other people interpret math language.

– The 2nd part is where we talk about things we like about the problem.  Common answers are asthetic things  – equal signs lined up, etc.  I tell the students here that “you have been in math for 10 years, you should develop a taste about what you think is good or not good.  Imagine if you were painting for 10 years, you would have an opinion about what makes good art”.  I have them all write down one thing that they like.

– The 3rd part is where we talk about things that are correct.  This is where I always say “remember, in every wrong answer, there is always something right about it”.  I have them all write down one thing that was correct about the problem.

– The 4th part is where we discuss what went wrong, and what corrections need to be made.  I have them all write down one thing that was wrong about the problem.

– The last part is where we discuss key points.  “What can we take from this problem, that is going to help us when we take the test?”.  I have them all write down one key point.

– After the Math Hospital is finished, I have the students work a similar problem to what they just analyzed.  I have them do it on the back of the exit ticket.

–   Lastly I tell them that if they are still confused then they might want to consult another physician.  In this case the other physician is Salman Khan,  and I show a slide that highlights the exact videos on Khan Academy that cover the topic we were discussing.

Here is the handout that I give each student the first time we do the Math Hospital.  It is basically the same as what my instructional coach had given me, but since I did not have it digital, I recreated it.

The Advice:

– I recommend repeating the purpose of Math Hospital everytime you do it.  I always go back to the theme “failure is helpful and not shameful” and I always during the second round I say “you’ve all done this problem, what about this work could you say ‘yeah I appreciate that’, or ‘I would not have thought of that'”.

– This is really meant to be a 15 minute activity.  Quick error analysis.

The Goods:

Here’s the .pdf –  Math Hospital

Update 1:

I remixed this a little bit, that post can be see here.  I now give each student a copy of the patient so they can circle and point to things that are right or wrong, that they like or dislike.  If I do this at the end of the class, I can now say “make sure this patient is healthy by tomorrow” and use it as a homework problem.